Disqus for Where Are My Knees

Health and fitness apps for the Kindle Fire

Friday, 22 November 2013

I was chuffed to bits last Christmas when I unwrapped a Kindle Fire that had been sat under the Christmas tree, courtesy of Father Christmas (okay, the boyfriend!) We both had tablets on our Christmas lists and not wanting to spend as much as the iPad we looked at more affordable options, and after an awful lot of researching and comparing I decided to plump for the Kindle Fire from Argos.

I'm definitely glad I did - it's easy and intuitive to use, with a brilliant and bright touch screen, long battery life and tons of apps that you can download (it uses the Android operating system so if you have an Android phone you'll be familiar with the wealth of app options on offer.  There are so many health and fitness apps available for the Kindle Fire that I thought I'd write a list of the best ones I've found for anyone else who already owns one or is lucky enough to find one in their stocking this year!

1. Daily Workouts - £1.86

This app - as the name suggests, has suggestions for over 100 workouts you can do daily, from 5 minute to 30 minute long workouts, including ab, arm, butt and cardio workouts and lots more.  You can use their bank of workouts, or make custom workouts from all of the ones available.  The app uses videos so you can follow along, along with a timer so you know where you are in your workout.  This is great for helping you fit exercise into your day, and also perfect for people who travel and want to do exercise whilst on the move.


2. MyFitnessPal - Free

Unless you're relatively new to dieting or food tracking, you'll probably be aware of MyFitnessPal, a calorie counter and food and exercise diary.  This is the app version of the website and offers all of the same functionality; the ability to search for and enter foods, scan barcodes, save your favourites, and track your progress.  You can also backup your diary so that you don't have to risk losing all of your records.  I have used MyFitnessPal a lot in the past to track my calorie intake and help me make better choices and using the app really helps me keep track of things whilst on the go.

3. Weight Watchers Points Calculator and Tracker - Free

Another great, free app for tracking on the go.  This provides points calculators for Points Plus and Original Points as well as keeping track of your points whilst out and about.  It takes the guesswork out of pointing and would be really useful for Weight Watchers members or dieters who don't use the online tracking tool.

4. Slimming World - Free, then £14.99 for an annual subscription

This isn't an app in the true sense of the word but is an app version of the popular Slimming World magazine. The app features a free trial period and then has the option of paying £14.99 for an annual, app based subscription to the magazine.  I think having the magazine as an app would be really useful for accessing the eating plans and recipes - I love propping up my Kindle Fire in the kitchen and following a recipe, so much easier than trying to weight down cookbook pages!

5. Deep Sleep with Andrew Johnson - £1.91

For me, a good night's sleep is the foundation of any good health and fitness routine.  Dragging myself out of bed in the morning for a run, or even making healthy food choices throughout the day, is hindered hugely for me on any days when I sleep badly.  This app helps people beat insomnia and provides guided meditation to help you get to sleep.  You switch it on when you get into bed and it helps you relax and unwind.


Personally I love my Kindle Fire and I think using tablet apps are a great way to keep on top of health and fitness and give you an extra bit of motivation.  Do you have any great app recommendations that I've missed off the list?

{ post written in collaboration with brand }

Chickpea and spinach curry recipe

Sunday, 10 November 2013

My normal lunch of salad or sandwiches just doesn't cut it in the cold winter months and having soup every day gets dull despite the endless flavour combinations. I've been batch cooking on Sunday's so I have varied, hot lunches to take work in the week and this curry is one of my favourites.


This recipe serves 3-4 depending on how much rice or naan bread you serve with it. 


You will need:


1 tin (420g) of cooked chick peas, drained and rinsed
2 cloves of garlic, finely chopped
1 tin (420g) of chopped tomatoes
4-5 handfuls of fresh spinach (I used waaay more because I love spinach)
1 large onion, finely sliced
Oil for frying

For the curry paste:

1 tsp ground cumin
1 tsp ground coriander
1 tsp tumeric
1 tsp paprika
1/2 tsp ground black pepper
1 red chilli, finely sliced (I used the frozen cubes of chilli)
Juice of 1/2 lemon (I used lime because it was all I had)
2 tbsps oil
1/2 tsp sea salt 

Making curry paste is pretty easy but if you don't have all of those ingredients it tastes just as good without one or two and you can always just buy some curry paste. 

Method


1. Make you curry paste by mixing all the ingredients in a bowl and smooshing them together. Ideally you would do this with a pestle & mortar but I don't have one.
2. Fry your onions in a little oil in a large pan until golden. Add the garlic and fry for a minute or two.
3. Add the curry paste to the onions and fry over a gentle heat for about 2-3 minutes before adding the chickpeas and tomatoes to the pan.
4. Cover and cook over a medium heat for 15 minutes, stirring regularly. Add more water or stock if it gets a bit dry. I add a lot of water because I like my chickpeas to be soft.
5. Add the spinach to the pan and cook for a further 2 minutes.

Without rice this curry is around 200 calories and contains 2 of your 5 a day. You can add some yogurt to serve or some coconut cream to make it a bit more saucy. Enjoy!

Blue Cheese & Pesto Pasta

Friday, 11 October 2013


Picture the scene a couple of Fridays ago. It was pouring with rain the whole way home, it was cold, and all I wanted to do was get in my house, in my pyjamas and eat some stodge. Because I batch cook a lot, I generally have ready-made meals in my freezer, so I figured I'd have something like my mushroom lasagne, maybe a bit of extra cheese, and then flop.

Anyway. I got home, and discovered a problem - I'd worked my way through all of my freezer meals. Nothing left except a rubbish pasta dish that was entirely tasteless. So I was left with a choice - eat the boring pasta dish and be hungry all evening (don't you find disappointing food never really fills you up?), go out in the rain and buy food, or get a takeaway. And I... went out in the rain. I WAS IMPRESSED TOO. But it wasn't actually that bad in the end, and it meant that whilst I walked to Tesco, I could think about what I fancied to eat and work out the points on my phone. By the time I got there, I knew that I wanted pesto, I wanted cheese and I wanted broccoli.

See, this is what happens when you eat healthily for a while. You start craving things like broccoli. Bloomin' love broccoli.

Blue Cheese Pesto Pasta
240g Pasta - 23PP
500g Chicken Breasts - 12PP
150g Danish Blue - 14PP
3 tbsp Pesto - 4PP
100g Philadelphia Light - 4PP
4 cloves garlic
2 red onions
1 punnet mushrooms
200g spinach
Big bunch of Broccoli

=57PP / 10PP per person

To reduce points: Reduce the chicken (it really wasn't needed), less cheese, less pesto

Serves 6

1. Put your pasta on to boil as per the package instructions.
2. Chop up your broccoli and boil in a separate pan for 7-10 minutes until tender (if you're super organised you could use the same pan as your pasta, just do the broccoli first and then use the same water to do the pasta).
3. Chop up your chicken and cook in your pan or wok with a little water to prevent sticking.
4. Add half your garlic as the chicken is cooking so it absorbs the flavour
5. While these are cooking, chop up your onions and mushrooms and set aside for a moment.
6. When your chicken is cooked through, add 1 tablespoon of pesto to it and stir until the chicken is covered.
7. Add the veg, stir well and pop the lid on for 5-10 minutes while the veg softens.


8. Add your Philadelphia and stir well - the liquid in the pan will help turn the cheese into a sauce, but if it's lumpy, add a splash of milk.
9. Chop up your blue cheese and toss it into the pan. Stir well. It's a soft cheese, so it will merge into the sauce easily.
10. Let this simmer away for a while. Your pasta should be done by now, so drain it, then pop it back in the same pan. Add a tablespoon of pesto to the pasta alone and stir until totally covered.
11. Chop up your broccoli and add to the sauce, then throw your pesto pasta in too.
12. Add the spinach to the pan and cover for about 3 minutes until wilted. Make sure you stir the sauce at regular intervals so it doesn't stick.
13. When the spinach has wilted, stir well until combined with the sauce. Add your third tbsp of pesto to the pan and stir through.
14. And you're done! If you fancy, you could then pour all of this into a lasagne dish, cover with a little cheddar, and bake for 15 mins or so to let those flavours all really combine. I served it as it was though with a little extra cheese on top instead... NOM. Exactly what I fancied.

Plus, the benefits of batch cooking - I had five more portions of this to add to my freezer stash. Hooray! If I made this again, I'd definitely bake it, and I'd cut out the chicken as although it was nice, it really didn't add anything. I think bacon could be good though!

As always, let us know in the comments or on Twitter if you make this - we love to see your recipe pics!

Shock Absorber Sports Bra Review

Monday, 7 October 2013

We do love a good sports bra here at Team WAMK, we are all very aware of the importance of adequate support during any exercise.  Hopefully none of you let your babies swing wild whilst exercising!  If you do please do yourself a favour and get yourself a sports bra, you will thank us for it when gravity kicks in.  Shock Absorber sent us two of their sports bras to review, the zipped plunge sports bra and the Active D+ flexiwire sports bra, we put them through their paces and here are our thoughts.

Zipped Plunge Sports Bra - size range: 32-38 B-DD.
Stockists: www.shockabsorber.co.uk


Sarah tested this one and loved it.  It is really easy to get on and off due to the zip front, there is nothing worse than trying to pull a sports bra over your head when you are all sweaty.  I have had to wrestle out of my old one far too many times, almost as exhausting as the actual work out!  It felt really supportive on - in fact my 34C's didn't move a centimetre whilst running, rowing or boxing.  It was really comfortable too, there are no fastenings on the back so it is perfect for mat work.


The zip doesn't come in contact with the skin, there is a tab of fabric to prevent any potential rubbing and there is a hook which you do up first to make zipping that zip up much easier.


The fabric is also moisture-wicking to maximise comfort during exercise.  Apart from providing good support I love the way it looks.  The racer back means I don't have to worry about straps falling down my narrow shoulders and the neon trim adds nice detail.  The zipped plunge sports bra does everything I could want from a sports bra, now to work on the flat tummy so I can wear it without needing a top covering it up!


Active D+ Flexiware Sports Bra - size range: 30-40 D-G, 32-38 GG-H.
Stockists: www.shockabsorber.co.uk

Sarah V tested this one. It's a much more traditional style, and I found it more snug than other sports bras I've worn. I don't think that's about fit, though, I think it's the style and it was still perfectly comfortable. In the past, even the best sports bra hasn't stopped my boobs moving around when jumping up and down at zumba, but this was so supportive. This bra is actually specifically designed for women with larger busts.


Like Sarah's bra, this is moisture-wicking and fully breathable. It's a great sports bra and one I'd certainly recommend.

What I Ate Wednesday - Sarah V

Wednesday, 11 September 2013

I’ll be honest, when I’m on a diet, I eat very similarly day in, day out. In the winter, I have soup for lunch pretty much every day – and sure, I mix up the soup flavours, but nine times out of ten, I go back to the same ones (because they’re the BEST ONES).

I had a day recently where I ate a bit differently, so thought it was a good one to include here. Particularly because there’s a VERY surprising treat included... I’m a bit amazed I could get it in too and still be under my 26PP!

Breakfast
2 Alpen Light bars – 3PP


These are a godsend when you know you are going to have a bad day, or are eating on the run. Originally I thought they were quite high at 2PP each, but they’re victims to WW’s rounding up/rounding down policy. In reality they are probably about 1.6PP each – which would be rounded up to 2 - meaning that two is 3.2PP – which would be rounded down to 3! So useful – I always try to have a box of these at work and also at home. The Lemon Drizzle ones are so tasty but the Cherry Bakewell are the best ones!

Snack
Sainsbury’s Sweet & Salt Popcorn – 2PP


I am obsessed with these mini popcorn packets – they tend to hit the spot so much more than crisps as they satisfy the sweet and savoury craving all at once. The bags look small, but it’s more than enough for a snack. They’re amazing.

Lunch
Aubergine Parmigiana – 5PP


This is the recipe I posted a little while ago. I ended up having it for lunch every day that week – it reheated beautifully and everyone in the office was jealous. Plus, the halloumi chunks... yum. Having a slightly lower than usual lunch always makes a difference later in the day.

Snack
Krispy Kreme Donut – 9PP


WHAT WHAT? You heard me right, I managed to factor in a Krispy Kreme. You also heard me right, it is almost double the points of my lunch. I didn’t plan to have this, but someone brought them into work and I couldn’t resist. The best thing is I was already intending to have a low dinner, so it’s totally allowed!

Dinner
Butternut Squash Lasagne – 6PP
15g Cathedral City Light – 1PP


Bloody love this lasagne! It’s a really filling, tasty dinner, but shockingly low in points. The perfect recipe to make when you’re trying to have a good week, or perhaps trying to get back on track after a bad one!

Drinks
Water & Diet Coke


I drink about 3 litres of water a day, and sometimes allow myself a Diet Coke when I need a caffeine hit. I'm trying to get out of the one a day habit though - even though it's calorie free, it's so bad for you!

Total = 26PP exactly

Garlic & Mushroom Lasagne

Thursday, 5 September 2013


A long long time ago (okay, a few months) I made a mushroom lasagne. I was excited about it. It had so much potential. It was based on an Ina Garten recipe, it had butter in it, and it was full of mushrooms and garlic which are two of my favourite things. What could go wrong?

Well, quite a few things, as it hapens. It wasn't BAD, it was just... meh. It was overly wet and after spending ages sauteeing mushrooms in garlic and butter, I couldn't taste it at all. Upsetting.

It bothered me though. How could a recipe with so much POTENTIAL be such a letdown? I couldn't let it go. So, I made some tweaks, and tried it again. And this time? This time it was EPIC. This recipe? Pah. But THIS recipe? I completely vouch for. If you like mushrooms, then you will flip for this. It's so rich and filling and tasty and wonderful and AWESOME.

Garlic Mushroom Lasagne
6 lasagne sheets – 11pp
1 cans Campbell's or Bachelor's Low Fat Condensed Mushroom Soup – 4pp
60g Lurpak Lighter – 9pp
125g Light Mozzarella - 6PP
200g light feta - 10pp
100g Low Fat Cheese - 8PP
6-8 x fresh garlic cloves - 0PP
2 red onions - 0PP
200g Spinach - 0PP
Black pepper – 0PP
4 x punnets mushrooms (about 1000g) – 0PP


48PP / 8PP

To reduce points - Use less cheese, cut out or cut down the butter.

Serves 6.

1 - Preheat the oven to 200 degrees.
2 - Clean the mushrooms and slice them 1/4-inch thick. You can use normal closed cup, portobello, or a mixture. I used 2 punnets closed cup, a punnet of mini portobello and a punnet of shiitake.
3 - Heat a little of the butter in a large non-stick frying pan or wok. When the butter melts, add a couple of crushed garlic cloves and a handful of the sliced mushrooms. Sprinkle with salt, and cook over medium heat for about 5 minutes, until the mushrooms are tender and they release some of their juices.
4 - They may become too dry, so add a little water. Toss occasionally to make sure the mushrooms cook evenly. When cooked, remove from pan, add another handful of mushrooms, another bit of butter, more garlic and more salt. Repeat with the remaining mushrooms and butter, then set all the mushrooms aside in a bowl.
5 - Go outside for a minute and then come back in. DOESN'T YOUR HOUSE SMELL AMAZING?
6 - Thinly chop up your red onions and cook until soft. Remove from wok, mix in with your mushrooms (you could also cook them together, to be honest).
7 - Steam your spinach by placing in the wok or your pan with a lid on for a couple of minutes until it wilts.
8 - Drain your mushroom and onion mixture. I recommend saving the liquid that comes out in a pan as you can use it later!


9 - To assemble the lasagne, place about half the mushroom and onion mixture in the bottom of your lasagne dish
10 - Cut up your feta and sprinkle over the top of the mushrooms.
11 - Add 3 of the pasta sheets over the top then add your spinach on top of that, spreading out evenly so every portion will get a good amount
12 - Add the rest of your mushrooms to the top of your spinach, then tear up your mozzarella and sprinkle on top.
13 - Add your last 3 pasta sheets.
14 - Pour your mushroom soup in a bowl and add a splash of the drained mixture from your mushrooms. This gross looking water is basically mushroom juice, garlic and butter - it's going to add some awesome flavour! Add as much as you want, and stir until you're happy with the consistency.
15 - It seems a crime to get rid of the remaining juices, but your mushrooms will release more juices whilst cooking though so you need to be wary of the dish getting too wet as it will sap the flavour of the mushrooms.
16 - Spread your soup over the top of the lasagne sheets - this is basically your white sauce.
17 - Sprinkle your low fat cheese (I use Cathedral City Light) on top, and add a few spritzes of FryLight, a dash of rosemary if you fancy it, and salt and pepper.
18 - Chuck in the oven! Bake for 20-30 minutes and then NOM.

I made mine 6 portions but you could actually stretch it to 8. It's very rich and filling. AND AMAZING.

Guest Post - Zero Point Ice Cream by Laura from Knead Whine

Saturday, 31 August 2013

Hi, I'm Laura from Knead Whine. In the last 15 weeks I've lost 16lbs and am 11lbs away from target. I'm with the Weight Watchers programme and honestly can't believe how easy it is. I can have a little bit of what I want and the weight comes off. I'm a huge fan of sharing something a little bit naughty with my three year old - a slice of lemon and poppy seed cake at Pret or a falafel mezze salad from Starbucks shared between two is very few points.

My favourite discovery BY A MILE is zero point icecream (although knowing that a Green and Blacks dark mini is two points is something else I'm rather fond of!). Having discovered something I love, I couldn't help but try different variations and add the odd point here and there as I went.


Option one: - Banana, raspberry and cinnamon
Stats: two servings, 1 propoints each.

Recipe:
One banana, cut into coins and frozen
A handful of raspberries
A tablespoon of cinnamon - split between two people made for one propoint each.

Freeze the banana in coins, freeze the raspberries. Sprinkle with cinnamon and blend. We enjoyed this at the end of a really busy day at school fête and Newburyfest. Could have done without the cinnamon actually. Nicely pink and raspberryish.

Option two: - Bananaberry
Stats: one serving, one propoint (pointless without the meringue)

Recipe:
One banana, cut into coins and frozen
A handful of Waitrose essential berries mix
Grating of fresh nutmeg
Two mini Waitrose meringues

Blend together all ingredients except the meringues. Place meringue on top. Enjoyed on a very hot evening after a day of Tumble Tots and owl making.  

Option three: - Creamy banana
Stats: - one serving, one propoint

Recipe:
One banana, cut into coins and frozen
40g (to taste) of no fat natural yoghurt.

Blend banana and yoghurt together. A slight yoghurt tang and tasted like an even creamier version of the original. Enjoyed this on the night that the storm was promised to break after the hottest day of the year. 

Option four: - Peanut mocha
Stats: - two servings, two propoints each

Recipe:
Two bananas, cut into coins and frozen
2 teaspoons smooth peanut butter
2 teaspoons cocoa powder
20ml coffee - a good way to make use of the little bit that is always left over after I've used the coffee machine in the morning.

Blend ingredients together. This was quite tasty - although it could do with either dropping the peanut butter (making it only 1 propoint) or the coffee.

I've got loads more that I want to try out - a plain mocha option, a cashew butter option, maybe even an avocado option! Now I've started with this the possibilities are (almost) endless.

How to get past a plateau

Thursday, 29 August 2013


The above is a real chart of my weight loss since January. Starts off so well, doesn't it? A nice, steady downward slope. And then it kind of... straightens up.

Even when I've been losing weight steadily, I live in fear of the dreaded plateau. We all know it's coming, and sooner or later we are going to get to the point where nothing is changing. So what do you do?

My weight has just started really moving again for the first time since e start of June, and I've actually lost around 4lbs in the last week or so. It's not been a fluke, though - I've worked bloomin' hard to shift that! So I thought I'd share my tips for getting through a plateau.

1. Exercise
I'm sure there are some dieters out there who are instantly like 'I'm out.' I'm with you! Exercise is the WORST. And for the first few months of WW, I didn't do any. Then I started walking a bit more. I started making a point of taking the long way round, and instead of driving the 3 miles to my parents' house, going by foot. Eventually, I braved a Zumba class for the first time in almost a year. And you know what? I loved it!

My point is, start slow. Take it easy at first. But when you approach that plateau, it's time to step it up. And you might actually find that you enjoy it.

2. Go back to the start
My first few months on WW, I tracked literally everything I ate and I saw serious results. But gradually, I started to miss the odd day here or there. A night out was a total write off. And my weight stopped going down. Some weeks, it went up.

The last few weeks, I've started following WW like a newbie again. It's got my motivation back and made me aware of the little extras that were creeping in. Have a biscuit, it's fine. But it DOES count.

3. Set some new targets
That dress in a size smaller, getting to a certain weight, finally being able to wear skinny jeans... if you believe you can, then you can.

My goal was to fit into a size 12 bridesmaids dress for October and you know what? It fits. But it could fit better. So now I'm focusing on getting to a certain point, which would be the slimmest I've been for 7 years. It'd be kind of a big deal to me, and I'm 11lbs off right now.

4. Think about how far you've come
Sure, you look better. But how do you FEEL? After losing 2 stone, my self confidence is higher than it's been for a long time. I actually like photos of myself again. But physically, I feel so much healthier. The sore knees and back that were plaguing me last year have gone. My body is full of good stuff, and my tummy is both smaller and happier for it.

5. Try something new
Like a new exercise class, or some new recipes. There's tons on the Internet - on this blog even - plus in recipe books, magazines. Branch out, get out of your rut, and you might actually get excited about cooking healthily again. And I need to take this point on board, as I've been living on butternut squash lasagne lately. It's so good though!


You might have actually already achieved your target, and if you feel great as you are, that's awesome. You're not at a plateau, dude! You're at target! APPLAUSE.

If you have any other ideas, let us know in the comments!


Image source

Chocolate and Peanut Butter Protein Mug Cake Recipe

Friday, 23 August 2013

I'm currently trying to eat 'clean' - no refined sugars or processed foods - along with trying not to eat many carbs.  Trust me when I say that on that diet, sweet treats are few and far between. So I was at a bit of a loose end this afternoon when I had a real hankering for a warm slice of cake to have with my afternoon cup of tea.  I suddenly remembered that I'd seen people post protein mug or bowl cakes on instagram - cakes made with protein powder and cooked in the microwave.  I did a lot of scouting around the internet and finally found a recipe on a MyFitnessPal forum.  I have the Cookies and Cream flavour Whey Protein from My Protein which I bought a few weeks ago, it's only £12.89 for a kilogram so it's really good value and I thought it would be amazing in milkshakes (it is!) and in baking.  The recipe said to use vanilla protein powder but it was still delicious with the flavour I had.

Ingredients:

1 scoop vanilla whey protein powder 
1 tbsp unsweetened cocoa powder 
1 tsp sugar or sugar substitute (I use Truvia baking blend) 
1/4 tsp baking soda 
pinch of salt 
1 egg 
1 tbsp almond milk 
1 tbsp peanut butter 

Instructions:

Mix all the dry ingredients in a mug (protein powder, cocoa powder, sugar, baking soda, and salt) with a fork until well blended and there are no clumps. Add in the egg and almond milk and mix until smooth. Drop the peanut butter into the center of the chocolate mixture and press down to submerge. Microwave for around 1 minute on high (give or take some time depending on your microwave), but watch it! It will start to bubble over the top. If this happens, stop microwaving, press batter back into mug with fork, and continue microwaving. When finished, cake should be cooked but still very moist. It is okay if not all the batter has cooked! 

This is what it looked like pre-microwaving:


Mine took about 1 minute 30 seconds in the end, when I took it out it looked like this:


It slid out of the mug easily and exposed a gooey base of peanut butter goodness!


I put the ingredients into My Fitness Pal to save it as a recipe and it says it has:

311 calories
4g carbs
16g fat
31g protein
455g sodium
4g sugar

I worked it out to be 7 WW Pro Points but I could be wrong.  Whatever diet or plan you're on it's a great way to get protein and satisfy that sugar craving without going overboard on calories or filling up on the naughty kinds of sugars.  I served mine with blueberries and greek yoghurt and it was really yummy.


It was a much firmer consistency than cake normally is, very very filling and really felt like such a treat.  I'll definitely be making it again and looking up more recipes.

Let us know if you make this or if you try any other protein cake recipes!

Saints & Slimmers Review – diet meal delivery

Tuesday, 20 August 2013

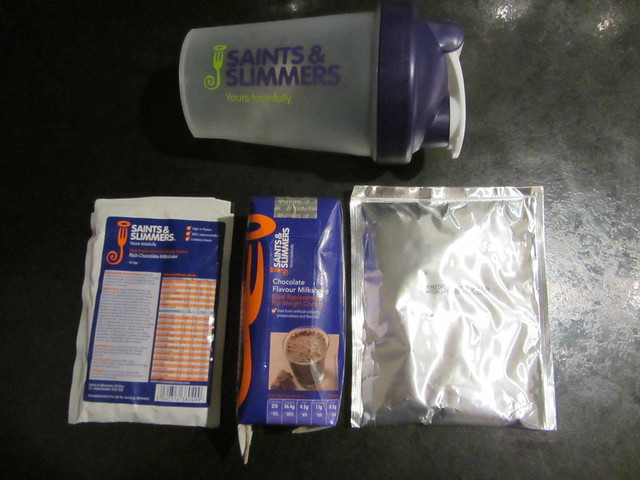
Saints & Slimmers aim to help you to lose weight by supplying you with ready-prepared calorie-controlled meals (and meal replacements like bars and shakes). After a few months of only very loosely following the Weight Watchers plan after a big weight loss I was looking forward to trying out a more structured diet plan for a few days. I was provided with three days worth of food to trial which followed three different plans. 

I have never tried any plans like this before and I always aim to prepare my food myself although I occasionally have a ready meal if I'm in a hurry so I was a little worried about not being able to chose what I ate or if it would suit me. 


Saints & Slimmers Nutritionist Charlotte Mullins says “We recognise that one diet plan does not fit all so we have designed several different plans. We all gain weight differently and we are all different in our approach to weight loss, so it stands to reason that not every diet plan should be the same.
“We offer sensible diets that provide healthy meals and tasty meal replacement products that are scientifically proven to help people lose weight. Key products contain active ingredients such as green tea extract and L-Carnitine and are enhanced with protein and fibre meaning followers stay satisfied and fuller for longer so no excessive food cravings which often see us heading for the biscuit tin.” 

So what did all of this mean for me and how did I get on with the plan? 

Day 1.  The VLCD   600 kcals a day (average 4lbs weight loss in a week)

Breakfast : Meal replacement product - 100% natural shake
Lunch : Meal replacement product - Chocolate Milkshake 
Evening : Meal replacement product - Soup


I was a little worried about day one because if i didn't like any of the products I wouldn't be able to replace them and I find it difficult to drink milkshakes if I don't like the flavour (banana, gross) but I didn't need to worry. I liked the shake I had in the morning which I added fresh milk to and the soup and other shake were both very palatable. I loved having extra time in the morning because I didn't need to make breakfast or prepare a packed lunch. I made sure I drank plenty of water and didn't feel hungry on day one at all.


Day 2.  The VLCD 800 kcals a day (average 3lbs weight loss in a week)

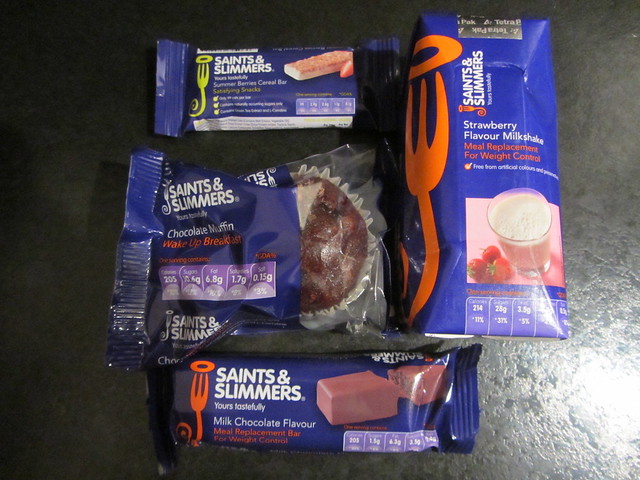
Breakfast : Muffin
Mid morning : Summer Berries Cereal snack bar 
Lunch : Meal replacement product - Sinless Meal bar Chocolate 
Evening : Meal Replacement Product - Strawberry heavenly Milkshake


I found day two a bit of a struggle. All the foods are high protein and fibre and very filling but I have an hour lunch break and found it a little odd to just eat a bar. The milk chocolate bar was so very filling but I found it a little hard to eat as the texture was unusual. I really wanted a huge milky coffee in the morning with my cereal bar and it was hard to say no to a Costa. I also met with friends after work this day and had to settle for a glass of water rather than a gin and tonic which was a little heartbreaking. Again, despite the amount of food appearing to be quite small I was full all day.

Day 3.  The Complete  1200 kcals a day (average 2lbs weight loss in a week)

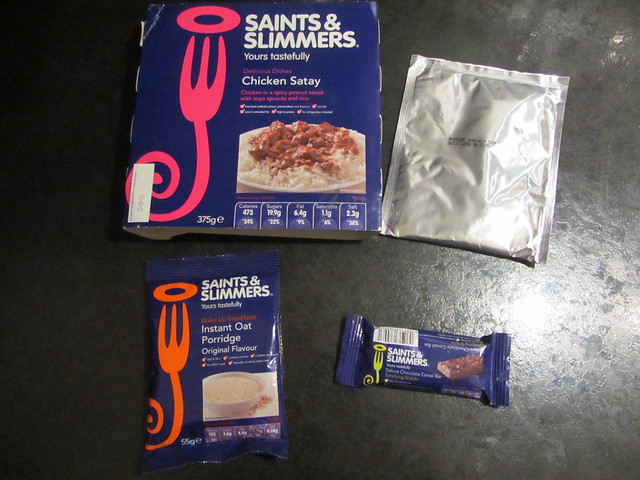
Breakfast : Porridge 
Mid morning : Deluxe Chocolate 

Lunch : Meal replacement soup

Evening : Low calorie ready meal 

You can also add up to 200 kcals of vegetables / fruit and dairy to The 'Complete' plan.


Day three was by far the best day on the plan. I liked all of the foods on this day and the ready meal was a welcome break from sweet bars and shakes. I was also able to add fresh food this day and had a lovely fruit salad with my soup for lunch. I really didn't feel like I was eating diet food on day three and could easily follow this plan for three/four days a week and go for lower calorie options on the other days.

Overall, it's great resource for people who struggle for time to prepare foods and who have to find the time to eat on the go. It's easy enough to snack on a meal replacement bar at lunch or drink your milkshake on the way to work. I found the lack of fresh food a little odd and difficult to get used to but if you prefer to cook your own meal in the evening like I do you can, having two meal replacement bars/shakes for your other meals. I think this would suit me much better and would allow for things like cooking for friends and making sure I can sit down with my family and eat the same things as them. 

They also have a range of tools, advice and online support available to help with your weight loss. Saints & Slimmers allow you to access their tools, information and advice, and interact with their online community without any purchase required. If you do decide to purchase food from Saints & Slimmers you can just try a few days to see if you like it before you commit to a month. I think the price of the plan is reasonable for the products you receive and levels of support you can access. 


I was surprised that I got on with the plan so well and I lost 2lbs in the three days. I would seriously consider buying the Breakfast and Lunch plan for £2.14 per day and making my own evening meal.


Have you ever tried meal replacement products? What are your thoughts on these types of diet plans?

MovBand UK Activity Tracker Review

Friday, 16 August 2013

A couple of months ago, three of the Where Are My Knees team were sent Movband trackers and some Movband accessories for review.  The Movband is an activity tracker that tracks 'moves' - its own record of movement - and miles travelled, every day.  You wear it on your wrist like a watch and throughout the day you can watch your moves increase. Tracking moves is done via a 3D accelerometer that tracks all kinds of movement.  The miles are calculated via your age, which you enter when you set up the Movband (it assigns you an average stride and uses that to calculate the miles you've travelled).


The device is very simple - it charges via USB, you pop it on your wrist and away you go.  Every night at midnight the Moves reset themselves so you can use it as an activity tracker.  The miles don't reset themselves but you can do this manually.

The idea of the Movband of course is to give you motivation to get more active.  You can set yourself personal goals (there isn't an online tracker or a way to upload your movements but you can use whatever recording system suits you - I took photos on my phone of the screen before I went to bed) and then monitor how you get on on a daily basis.


The tracker itself, as I mentioned, fits into a watch style wristband (the tracker works like a watch too and tells the time as well as having a backlight for night time use).  Because the tracker fits snugly into the wristand and is removable it means you can buy different coloured wristbands.  There's also a sweatband available with a pocket for the tracker but I found this uncomfortable and I can't see why you'd use it rather than on the wrist strap.


That's the Movband in a nutshell.  It's very simple, with no bells and whistles, and if you're looking for a basic activity tracker and something to provide motivation to get you more active, then it's definitely a fun and useful accessory.  Personally I own a GPS watch and a Heart Rate Monitor watch which I use to track exercise and running.  Both of these show calories burned, workout times, heart rate and so on, and really the Movband is not comparable to these.  For a start it retails at only £27.99 (compared to the £100 and £65 of the other watches I own).  Clearly the Movband is aimed at a different market to other fitness watches and activity trackers.  From what I mentioned about interchangeable, different coloured straps, it might not surprise you that Movband do a lot of work with Primary Schools to encourage children to get more active. Having had an amazing childhood of running round our local 'patch', playing Man Hunt, riding bikes and climbing trees, it grieves me to think of so many children these days spending evenings and weekends playing XBox or sat on social networking sites, and so I fully support this cause and this is a really applaudable section of their work.  Some of the things they do with schools are to have competitions for children to reach 100 miles in a certain amount of time, or giving out coloured bands for achievements such as 25 miles. Clearly this initiative works well and I think it's something that the Movband really lends itself to. I've also read about exercise instructors getting class attendees to wear them to track activity throughout a class and get people to be more active and animated during a session.

I personally think that Movband is a specific type of tool for a specific need.  If you want a measurement each day that will inspire you to get more active, this is perfect.  What it isn't for, is people wanting to know a tangible translation of activity based on your personal statistics, such as calorie burn or something backed up from another source like GPS or a Heart Rate Monitor.  On the first day I tried it I wore it on my wrist whilst scheduling blog posts on a Sunday and before I'd even left my office chair I'd racked up quite a few moves just by doing lots of typing! There also isn't guidance on 'what good looks like' so it's difficult to know at the end of the day whether your Moves and Miles are something to show off or something to keep to yourself - unless you join a group your only comparison is against your own figures (which for some people is obviously fine.) My best day was 14,970 moves and 17.5 miles but I'm not sure how impressive this is. Also there isn't a way to upload your results to the computer and track your activity online - the US version of the Movband you can, but with the UK version you can't (I spent quite some time trying to get it to work before realising I was on the US site - a bit confusing!) I think this is a bit of a shame, especially as the US version is actually cheaper, at $29.99 (about £20).


If you want a way to track activity over a daily basis, don't fancy wearing a chest strap/HRM and just want something fun to keep you motivated, then the MovBand is for you.

You can buy Movband in their online shop, it retails at £27.99.

Vaseline Deodorant Challenge

Sunday, 11 August 2013

We were recently contacted by Vaseline to see if we wanted to put their new Active Fresh deodorant to the test.  Active Fresh promises 48 hour protection, along with its Pro Derma technology that helps protect underarm skin and make it less prone to irritation.


I decided to test out the deodorant on two occasions, firstly on my birthday as I knew we'd be spending the day out doing lots of walking in the sunshine, and secondly on one of my morning runs so I could see how it fared during exercise.

The first thing I noticed when I took it out of the package was that it had a very strong scent.  Just taking the lid off filled the room with a fresh, almost clean laundry-esque fragrance.  I haven't used a deodorant with such a strong scent before and I must admit I was a little concerned that it would overpower my perfume or be quite cloying (it is a really nice smell though).

Luckily I didn't have anything to worry about and after the initial spritz the scent did die down, but sort of remained lightly in the background so that I felt quite fresh all day.  In the end, on my birthday we walked about 6 or 7 miles, and though I was a little sweaty afterwards (it was a warm day!), I certainly still smelled fresh as a daisy!

pre-run essentials - sports bra, deodorant, GPS watch, inhaler...
I then tested it on Friday morning on my morning run.  I gave myself a liberal spritz before heading out of the door and running about 3.5 miles.  Again, I was definitely sweaty - though this time everywhere but my armpits (it worked!) I am wondering now if I should have given myself more of an all-over spray!

I would definitely use Active Fresh again, it felt soothing on my armpits and I did feel fresh all day.  Although the scent is quite strong it's certainly preferable to smelling of sweat! It definitely made me feel more confident knowing I smelt nice all day - sometimes with going for a run in the morning before work (albeit I obviously shower afterwards), then working at a site where you have to walk around a lot, I sometimes feel self-conscious that by the afternoon I'm not as fresh as I was when I started the day, but this will definitely keep that feeling in check! It gets a big thumbs up from me!

Overnight Oats

Friday, 9 August 2013

If you follow me (@amilliondresses) on twitter or instagram you will have noticed that I have started  eating numerous varieties of overnight oats for breakfast.  I have been asked if it is like cold porridge and the answer is NO! It isn't like hot porridge either to be honest.  It is rich and creamy and very filling and the best bit is there are so many flavour options you can't possibly get bored. 

The basic ingredients are oats, yoghurt and milk and you can flavour it with whatever fruit you fancy.


I take a 2/3 cup of oats, add 2 tablespoons of chia seeds and then mix with yoghurt, almond milk and fruit.   For this one I have chosen to use peach yoghurt and add sliced peaches.


I add the yoghurt to the dried ingredients and give it a mix.  I then add almond milk by sight.  I want it too be slightly runny as the oats absorb the liquids overnight which is what causes them to soften


You can of course eat it in the bowl you make it in! I transport mine to work with me so a pretty jar works well for me.  I have put half of the oats into the jar, added a layer of peaches and then topped with the rest of the oats.  I love digging down and getting big chunks of juicy fruit.


I have tried quite a few flavour combinations, these are my favourite:

Oats, natural yoghurt, almond milk, chia seeds, honey & lots of blueberries

Oats, cherry yoghurt, chia seeds, almond milk, cocoa nibs & cherries

Oats, natural yoghurt, chia seeds, honey, almond milk and raspberries

Oats, natural yoghurt, almond milk, almond butter, chia seeds, honey and topped with banana

The opportunities are endless!  If you have tried it let me know what you think and if you have found the most amazing flavour combination please share with me in the comments.

What I Ate Wednesday - Sarah

Wednesday, 7 August 2013

Like Rosie I am currently not following any plan.  I am sticking to healthy foods with the occasional treat and making sure I eat breakfast, something I have always struggled with.  I haven't counted a single calorie, worked out any points or decided that any food group is banned.  I am trying to make it as balanced as I can by adding things like chia seeds to my breakfast to boost the protein and keep me fuller for longer.

This is the food I have eaten today and it's pretty representative of a standard day.

Breakfast

Overnight Oats with cherry yoghurt and fresh cherries
 
 
Lunch

M&S Pesto Pasta Salad (I drain the oil from this as I find it too greasy otherwise)


Afternoon Snack

Pineapple chunks, this pack lasts two days
 

Dinner

Chicken, spicy couscous & stir fry vegetables
 

Snacks

Jelly Tots, my favourite!

Drinks

3 large glasses of weak orange & pineapple squash
3 cups of tea


Do you think I am lacking anything in a standard day or even eating too much?  What would you add or substitute to make improvements?  I would love to hear any suggestions.